
Last updated on 25 February, 2019, 10:15am by
If you're already using a Retina mac/screen this will be pointless for you. However, if you're using non-Apple and/or non-retina displays, it's possible to enable high density display modes on your system that simulate Retina, for sharpness of images, text and UI elements.
Are you a designer or developer making media content for the web (websites, adverts apps etc) - but don't have access to a retina computer? The following method will allow you to get a good idea of how your solutions will look on retina displays, without having to purchase one.
Note: The caveat here is that, your native display resolution will essentially be halved, so for best results, you ideally need a monitor with a resolution of 2560x1440 or higher.
The most user friendly way to do this is to download the additional tools for Xcode from https://developer.apple.com/download/more/
Note: You may need to sign up for a free Apple developer account to access the link.
Download Additional_Tools_for_Xcode_8.2.dmg
Note: Newer versions might work as well, however, 8.2 was tested at the time of writing.
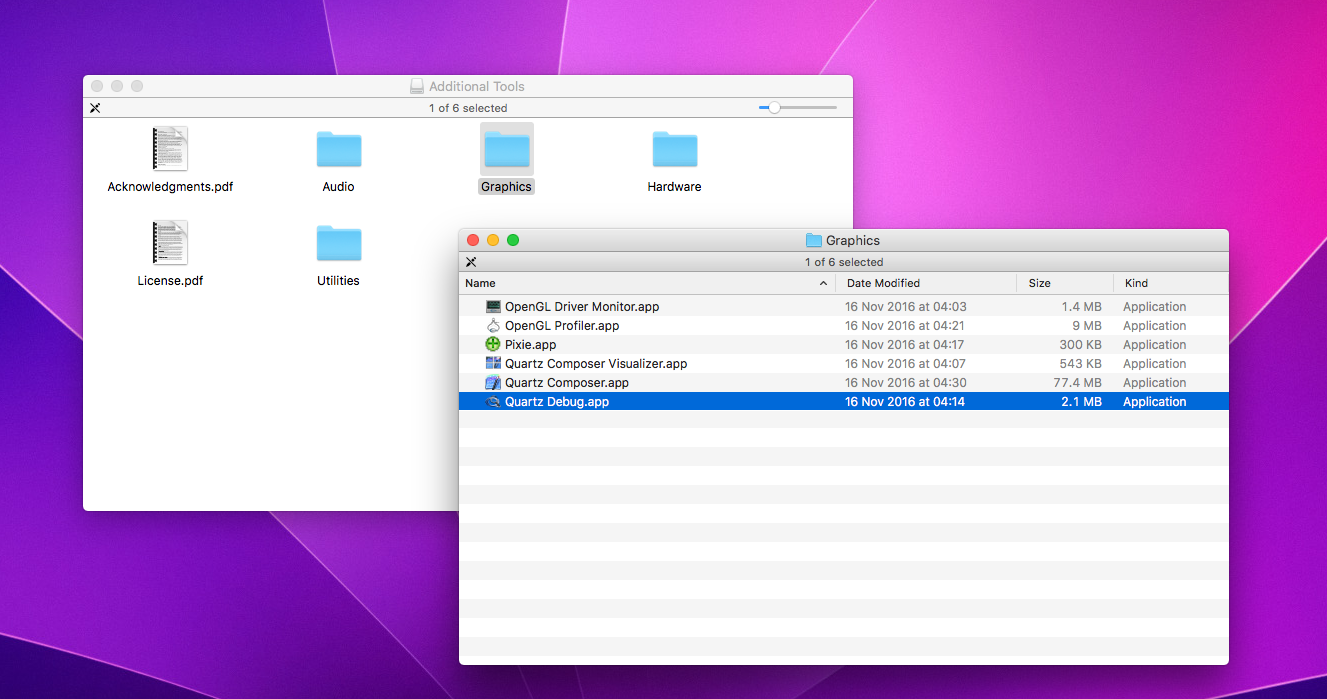
Open the disk image then go into the folder called Graphics and open Quartz Debug.app
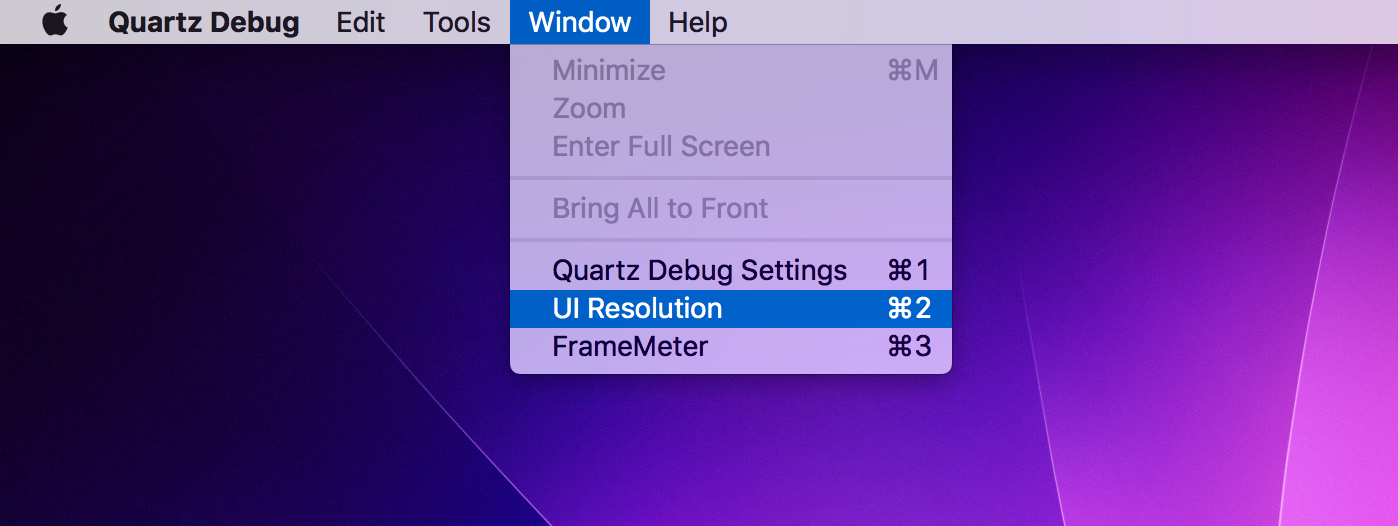
From the application window go to Window > UI Resolution
Check the box to enable HiDPI modes.
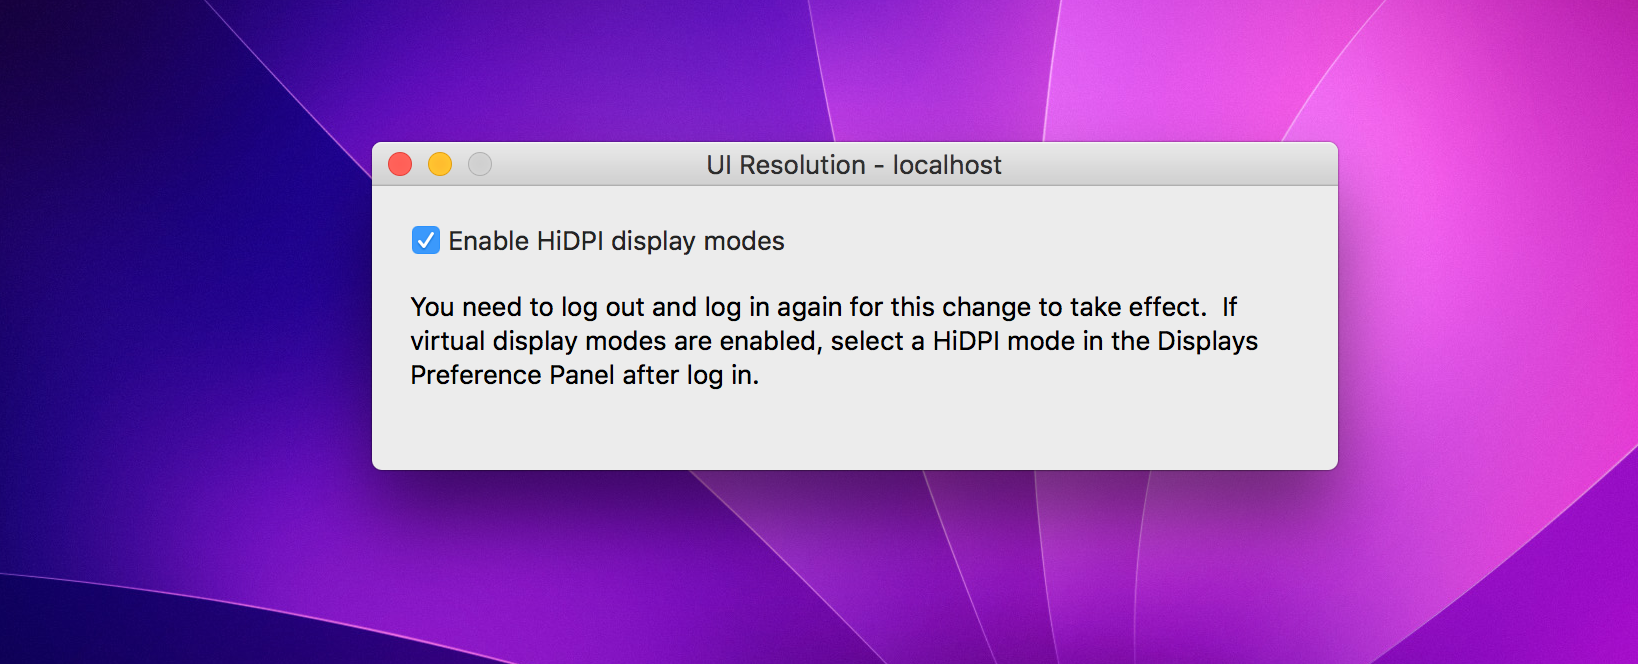
You'll need to log out and back in for this to take effect. Once you have done so go to System Preferences > Displays
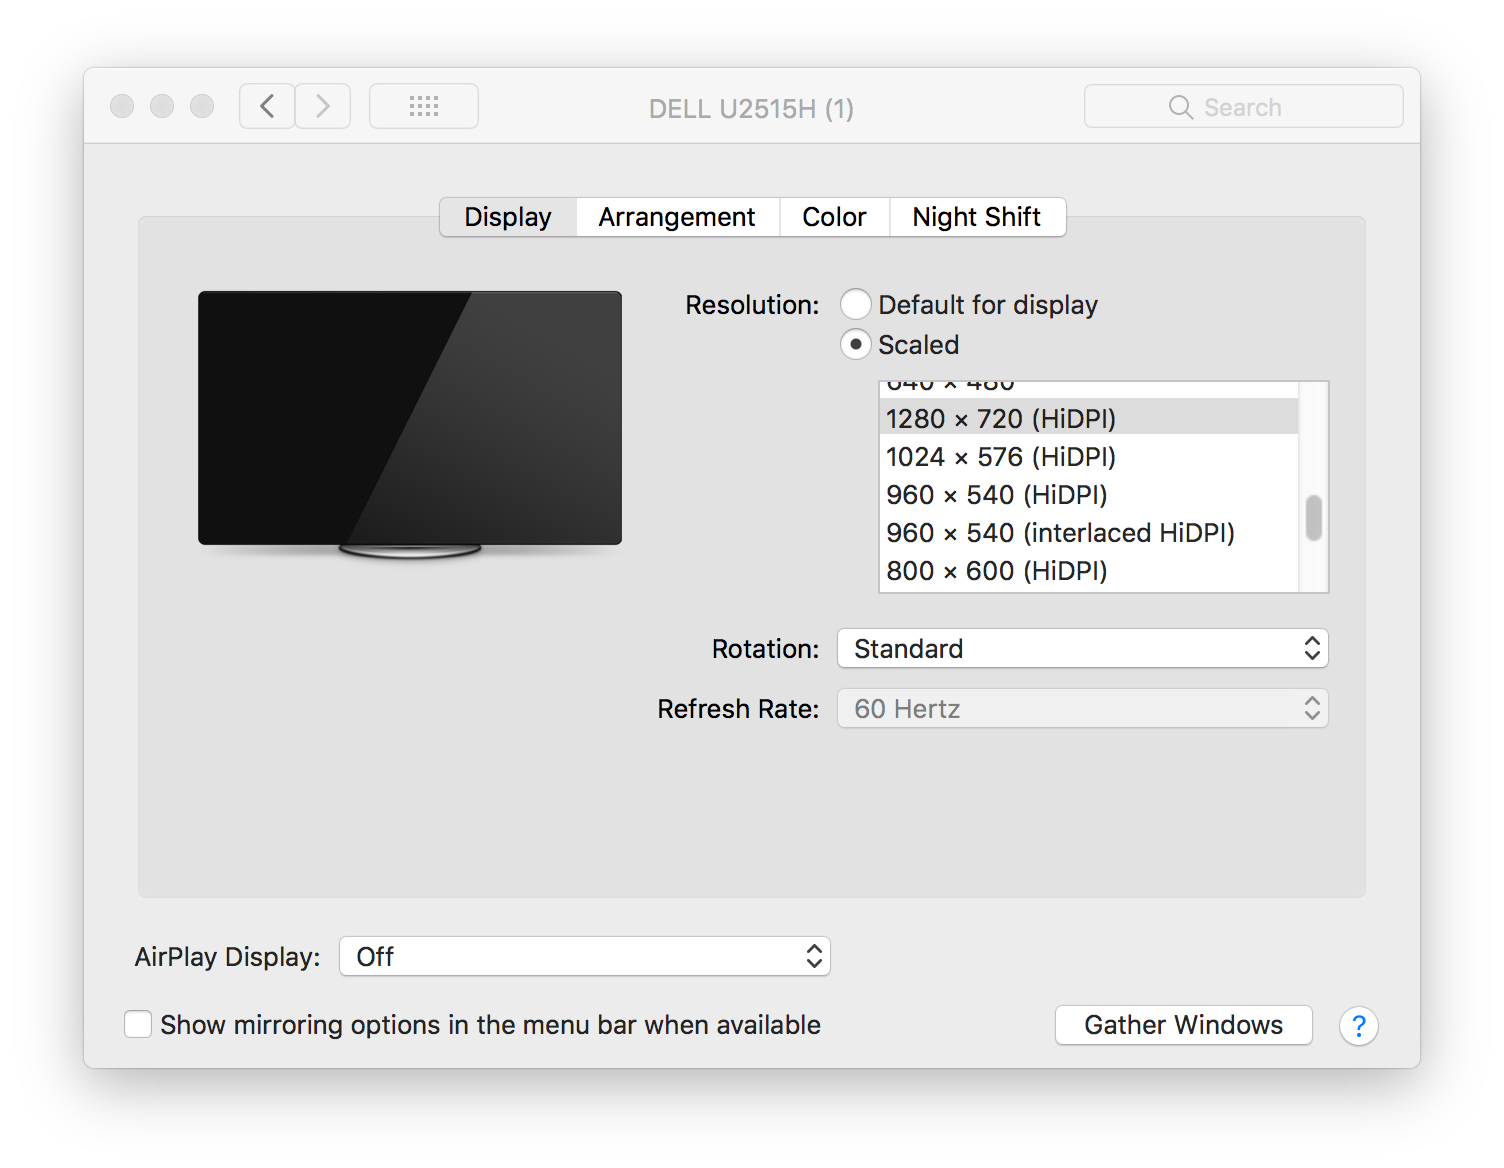
Under Resolution - select 'scaled' and you should now see a new resolution displayed with (HiDPI) in brackets next to it. Select this to switch to a Retina like resolution.
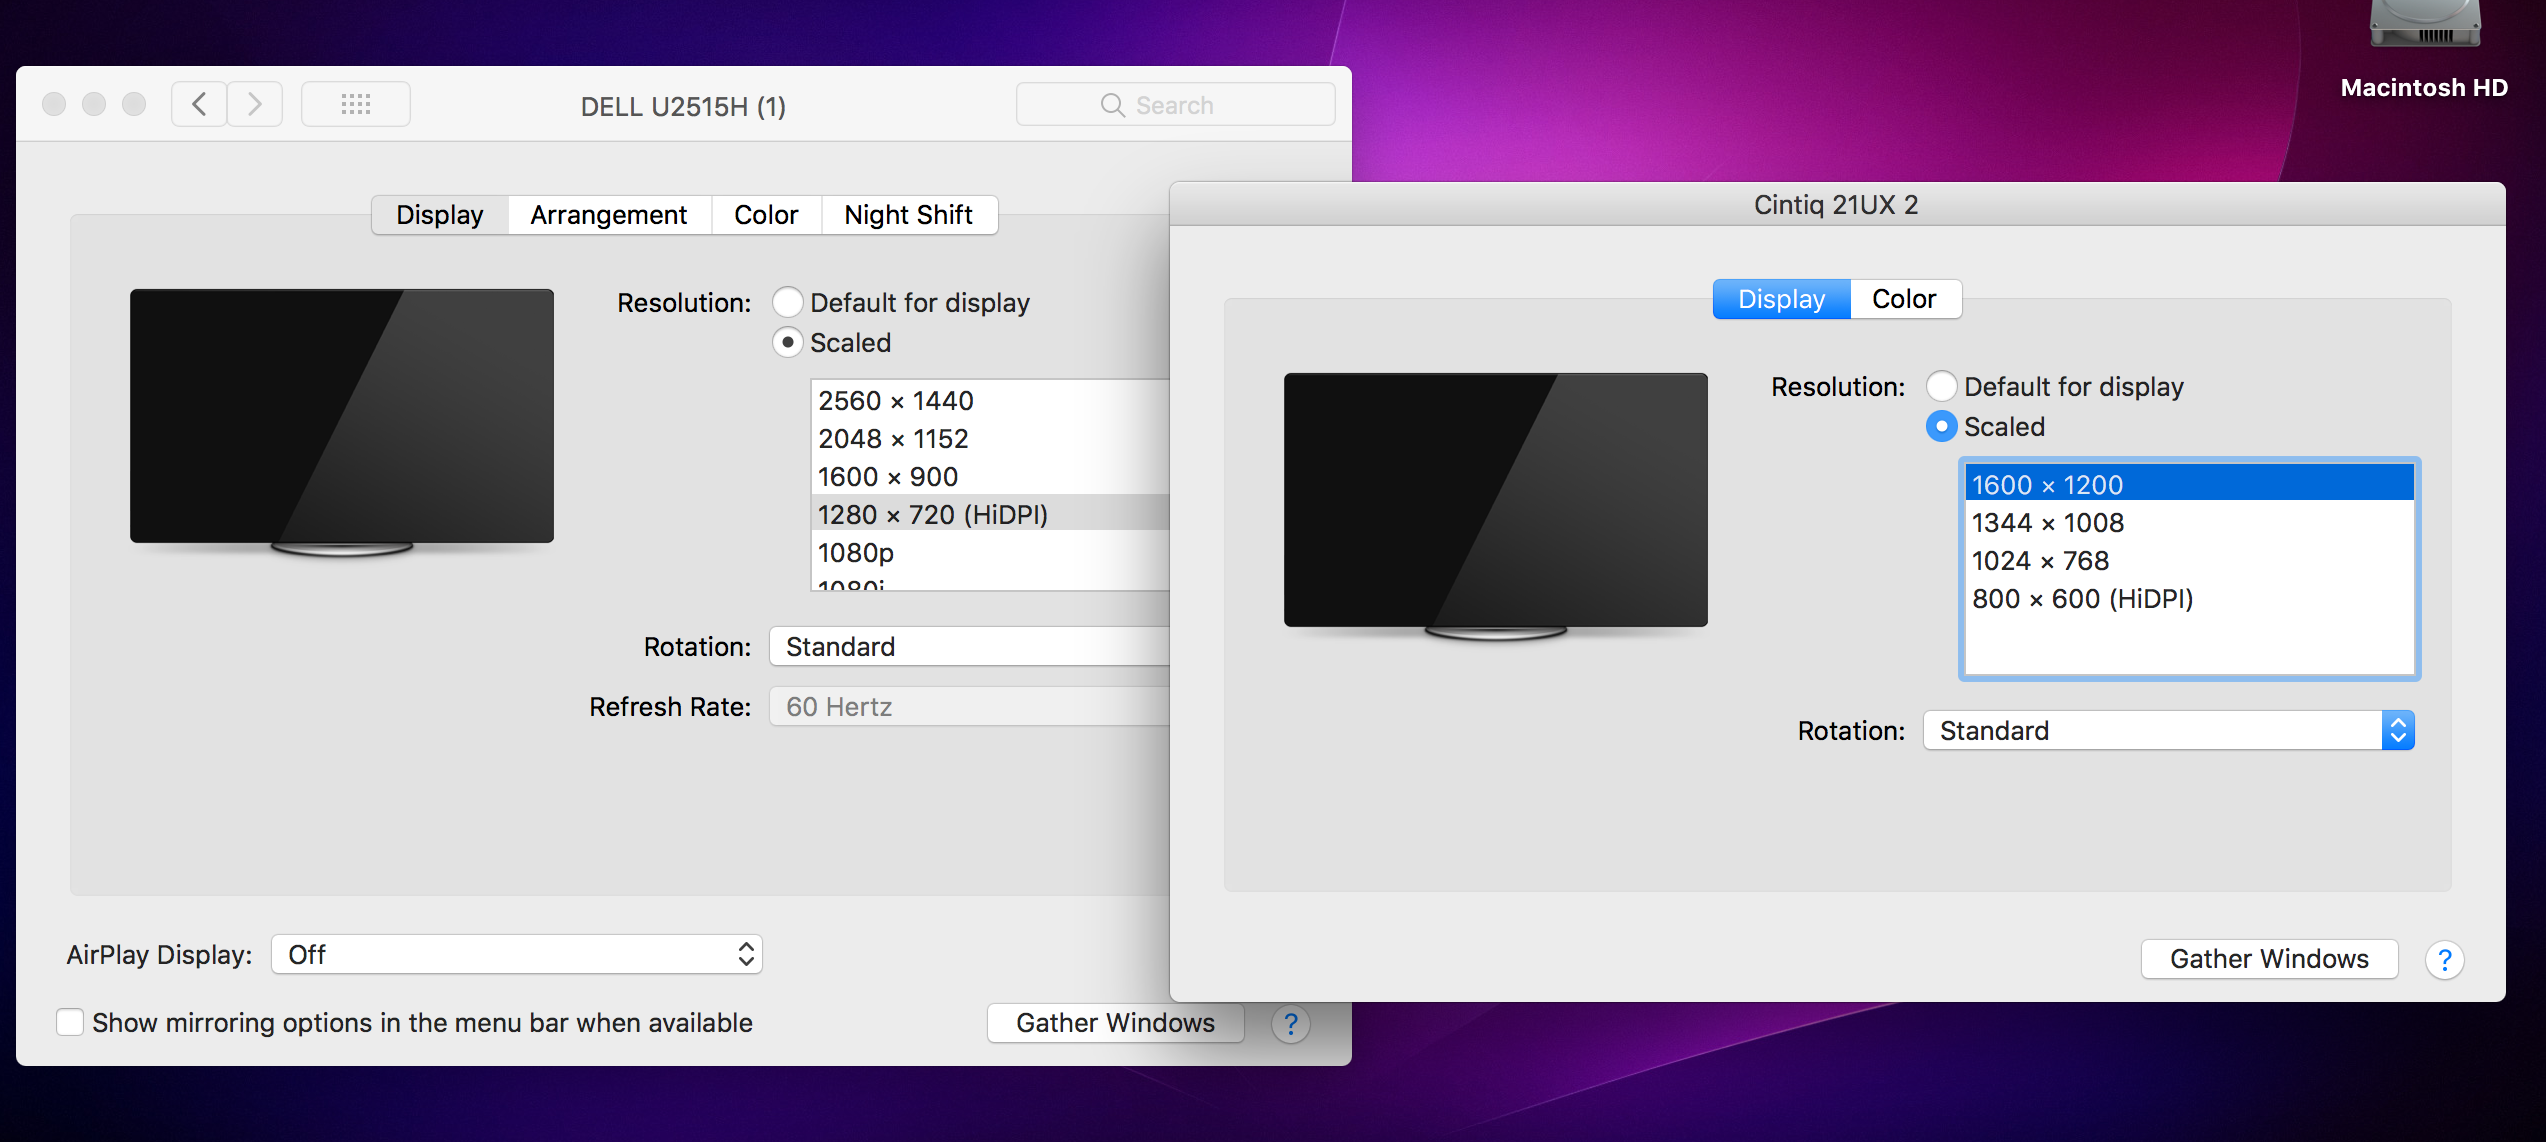
Here's a quick macOS tip, in System Preferences > Displays - you can usually access additional screen resolutions by alt-clicking the 'Scaled' radio button. In this instant, more HiDPI were revealed. Your mileage may vary and whether the additional sizes are practical to work with is a matter of personal preference.
In general, it's unlikely that you'll leave your monitor set to HiDPI resolutions. This is more of a temporary solution for debugging and QA purposes.
1) Blurry Images
Imagine you developed some rich media ads for a client, who feeds back that some imagery is blurry is some colleagues machine (only some, hmmmmmmmmm). One reason could be that the exported images are not high enough quality for Retina. This would be a quick way to preview the issue. Note: Blurry images can also be the result of subpixel rendering issues that result from double sized imagery, supplied with odd pixel dimensions (say 341x57) but that's a separate issue.
2) Documentation screenshots
Doubling your screen resolution can also help you make high quality screenshots for software documentation etc - particularly when you are taking a shot of a small portion of your screen.
I'll add more successes and failures to the list below as and when I come across them.
Works
- Dell U2515H
- Wacom Cintiq 21UX
- Macbook Pro 13 Inch (2011) Non-retina
Doesn't work
- Apple Cinema Display 27"
You can also enable HiDPI modes, without running any additional software, via Terminal.
Before doing so, it might be worth backing up /Library/Preferences/com.apple.windowserver.plist
Note: Remember to logout and back in, for the changes to take effect.
//To enable

sudo defaults write /Library/Preferences/com.apple.windowserver.plist DisplayResolutionEnabled -bool true


//To disable

sudo defaults delete /Library/Preferences/com.apple.windowserver.plist DisplayResolutionEnabled
Hope this helps,
Keston